Glazes and Layered Color
Glazes provide one of the most expressive and diverse forms of embellishment in glass gilding. This is where we paint the glass with a non-opaque glaze paint and back it with leaf. By combining paint and metal we can alter the color of the metal, build complex finishes using marbling techniques or create fully developed pictures with the reflective glow of metal shining through the various layers of paint. They are stunning with the right lighting.
I generally use genuine gold leaf but this is one area where the cheaper imitation leafs can be very useful.
The paints used (oil based) can be fully transparent, like those used for imitation stained glass which allow full metallic reflection. A translucent glaze of varnish or goldsize tinted with normal opaque lettering enamel obscures the reflection a little more for a softer effect. The more lettering enamel is added the less metallic it is. Printing ink can also be mixed with gold size for a transparent finish but I don't know how good its fade resistance is.
A simple color change can be done by painting the appropriate color onto the glass and either gilding directly onto this when it's tacky or letting it dry and gilding it later with either water or oil methods. When glazing, you can't get the full bright finish of straight water gilding. For a more interesting glaze you could add to this some texturing or add another color in a broken finish.
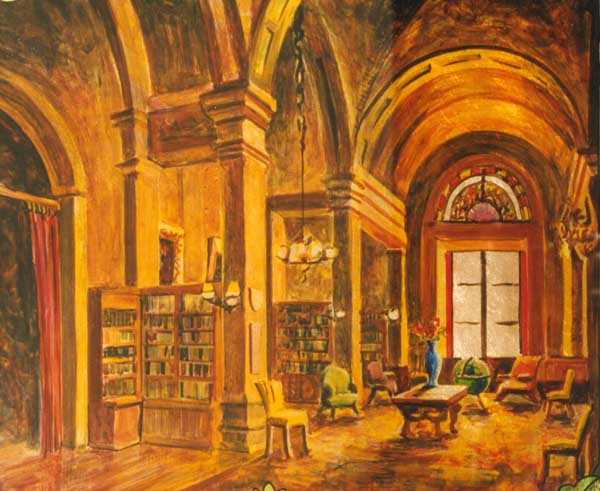 The
picture shown here is painted with transparent glazes and backed up with copper
leaf. It has up to a dozen layers of glaze in parts. I built up the picture
adding a color at a time and going over all the areas of the picture that
color was needed. The darker areas where built up gradually this way. The
door windows and light cast from it onto the table/vase were left unglazed
and are thus plain copper. When it was dry I oil gilded the copper backing
which gave it a glorious warm glow.
The
picture shown here is painted with transparent glazes and backed up with copper
leaf. It has up to a dozen layers of glaze in parts. I built up the picture
adding a color at a time and going over all the areas of the picture that
color was needed. The darker areas where built up gradually this way. The
door windows and light cast from it onto the table/vase were left unglazed
and are thus plain copper. When it was dry I oil gilded the copper backing
which gave it a glorious warm glow.
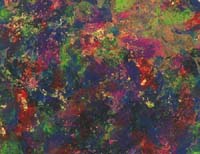
 Layered
glaze with gold fleck This finish seen in my work uses layered broken
color and gold for a rich complex effect. The method bears some similarities
to marbling.
Layered
glaze with gold fleck This finish seen in my work uses layered broken
color and gold for a rich complex effect. The method bears some similarities
to marbling.
- Lightly sponge or plastic bag on some goldsize and gild with transfer
gold leaf. You only want a light speckle of gold.
- Mix a dark color glaze of enamel in goldsize and daub on 50%+ coverage.The glaze should be translucent, just enough to tint the gold. If you painted it onto a page you would clearly read any printing underneath, even with two or three coats. Break up with plastic bag. Lightly gild with transfer leaf. Here's my secret, I use leftover transfer that has only got residual bits of gold on it. This gives a combination of little specks with some flakes here and there.
- Repeat the last step with the same glaze or use a different earthy color
- Do it again. You can add bigger pieces of gold to fill in areas. Now you should be getting some nice complexity with gradual darkening of bits of gold in the background.
- When you get to a stage of between 70%-95% gold coverage, back up with
black.
 It
looks good in a combination of dark green and brown (burnt sienna). Keep the
colors subdued dark and earthy for a pleasing natural finish that always looks
great.
It
looks good in a combination of dark green and brown (burnt sienna). Keep the
colors subdued dark and earthy for a pleasing natural finish that always looks
great.
Using strong hues of blue, purple, red will emulate opal.